Thursday, January 28, 2016

Cabbage Slaw (a knife skills lesson)


KNIFE SKILLS!  Cabbage slaw is the ideal opportunity to practice a wide variety of techniques, and it follows our Tex-Mex theme.

Ingredients:
 - 1 red cabbage, sliced
 - 1/2 large red onion, finely sliced
 - 1 jalapeno pepper (seeded and finely diced)
 - 1/3 bundle of cilantro, coarsely chopped
 - 1 lime, squeezed
 - oil
 - light-tasting vinegar (apple, rice, white wine, etc)
 - salt (heaps)
 - pepper (heaps)
 - cumin (some)
 - paprika (some)
 - garlic powder (minimal)
 - chili powder (to taste)

Level 1:  Cabbage!

The wavy internal structure holds everything together, so it's a great for a warm-up veggie.

Peel off the floppy leaves (2-4).  Cut off the bottom and slice in half.  Cut at an angle to remove the core.  Then, slice finely and chop into quarters.


Level 2:  Jalapeno!

Cut the top off and halve it.  Use the tip of your knife to remove seeds and placenta (the term for the capsaicin-producing white ribs).

Press each half of the pepper against your cutting board until it splits and flattens.  Using proper cutting technique, slice diagonally (down and forward), with your fingers tucked away from the blade.  A fine dice is the goal.

Level 3:  Red Onion!

Cut the top and bottom off.  Split in half.  Thinly slice the red onion.  Your last couple slices can be done separately (to spare your fingers).

Mini-Boss Level:  Spices!

Add salt, pepper, cumin, paprika, garlic powder, and chili powder.

Level 4:  Cilantro!

After washing your cilantro, fold it into a bundle, and tightly press it against your cutting board.  Using an orbital slicing motion, coarsely chop the cilantro.

Boss Level:  The secret to great slaw.  

Cabbage and acidity are besties (just ask sauerkraut!).  Acid helps to mellow the bitterness of cabbage, soften the fibrous structure, and the liquid helps transfer flavors between the components.  Oil adds lubrication and texture, but you don't want much (a tablespoon or two).


Time allows the flavors to mingle and develop.  If there's time, prepare it the day before.

Thursday, January 21, 2016

Carnitas (Pulled Pork Tacos)


Continuing our exploration of Mexican cuisine, here's a super-easy recipe for carnitas.  It takes all day, but it's ridiculously easy and will feed a seceding army of Texans.

Carnitas translate to "little meats" but are typically referring to pork tacos.  If you order barbacoa (translates to "barbecue"), that usually is beef in America and goat in Mexico.

The common theme is big hunks of meat, that contains lots of fat layers and connective tissue.  Slow cooking them will keep temperatures low and prevent moisture from being squeezed out of the contracting muscle fibers.  It also renders the fat out, gently frying it from inside.  The skin, slabs of fat, and cooking liquid will act as moisture barriers, further keeping the good juices inside.

Our Goal:  185 - 190 F (87 C), as slowly as possible.

Rant:  We are using lard!  If you grew up in a family that demonized it (as mine did)... it's time to open your culinary mind to "pork shortening."  Just like with deep frying, the oil adds thermal mass and gives a circulating liquid for efficient heat transfer.  It's all about temperature regulation, and lard is an excellent thermal damper/buffer/stabilizer for this temperature range.  When cooking is done, the fat is liquid will drain off.  Your meat will be lean AND moist.

Ingredients:
 - bone-in pork shoulder (this 7+ pounder is called the picnic shoulder cut)
 - lard (or shortening, if you're culinary mind isn't yet enlightened)

            * Your goal is 90%+ fat coverage.  There are no quantities here.  Dial in the amount of lard... using the pot's diameter, the meat's effective diameter, and coverage of its fat slab.  You want the fat slab to protect the top, and the lard to protect the bottom.


Spoon the most of the lard into a large dutch oven, and heat just enough to liquify.

Drop on the entire picnic shoulder.

Set your probe thermometer to 190 F and insert to the center, avoiding the bone.


Set oven to 250 F and check back every hour or two.  This one took about 7 hours.


TA-DA~!

Drain the meat and let rest on a cutting board for 15 minutes.  Carefully peel off the skin, scrub the fat layer, remove the bones, and pull pull pull!  This is the toughest part of the whole recipe.

Note that there is no seasoning on our meat.  There is more than enough flavor in the supporting cast to keep your taste buds entertained: guacamole, cabbage slaw, and my new favorite salsa from Texas.  Good tortillas (corn or flour) are the preferred platform.


Thursday, January 14, 2016

Pork Chile Colorado


Continuing our binge of Mexican culture, today we're delving into the roots of chili.

The modern definition of chili is a liberal interpretation of the classic dish.  You can get vegetarian chili, Cincinnati chili (on spaghetti noodles LINK), and white chili (with cannellini beans LINK).  Basically any flavorful stew is considered chili nowadays.

If you go down to Texas and ask for a "bowl of red," you'll get a simple dish of beef and a spicy sauce (no beans or veggies).  LINK to a tasty recipe  This is similar to the Mexican dish "Carne Con Chile" which translates to meat with peppers.

One popular variant of Carne Con Chile is "Chile Colorado," which doesn't refer to the US state... but rather peppers turning red or blushing.  Any meat can be used, but today we will use pork because this is traditionally used by todas abuelitas debajo la frontera. 

We are using this recipe as a starting point:  LINK

Make no mistake... this is a spicy recipe, so feel free to dial back the intensity using hatch, anaheim, poblano, or red bell peppers.

Ingredients:
  • 2 - 4 pounds of pork shoulder or loin
  • 5 - 10 dried ancho peppers (roasted poblanos)
  • 1 can of chipotle peppers in adobo sauce (roasted jalapenos in the world's tastiest goo)
  • 1 large white onion, diced
  • 6 cloves of garlic, minced
  • 4 cups of broth
  • 2 tablespoons cumin
  • 2 tablespoons garlic powder
  • 2 teaspoons black pepper
  • 1 tablespoon oregano
  • Salt (to taste)
  • Canola oil
Start by removing the stems and seeds from the anchos and rehydrating them in a pot of boiling water (for 15 minutes).


Next chop the onion and garlic, reserving it for later.


Take the pork shoulder/loin and butcher it into 1" (25 mm) cubes.  They will shrink slightly during cooking, and you're aiming for big-bite-sized pieces.

If you use a loin, it can be a tricky piece of meat.  I was noobsauce, but used this LINK to wise up.

There are two sections, dark red rib meat and pink center loin.  There's a layer of fat and silver skin between these two.  You can separate the two sections and remove it... but I didn't do this (since we're slow cooking).  The tough fatty layer on the outside was removed, but the thin layer of rib fat is going to bring some tastiness to the party.


Put some oil in a big pot and lightly sear the pork with some salt, pepper, garlic powder, and cumin.  Add the onions and garlic when the pork starts to lose its moisture.


While this is cooking away, move to the chile sauce.  Drain your anchos and put them in a blender with the chipotles, salt, pepper, and oregano.  2 cups of broth/water will loosen up the mixture.


Combine the sauce, meat, and veggies base.  Add 2 additional cups of broth/water.  Allow to simmer for 1-2 hours.


Serve over your favorite starch (we used polenta/grits since maize is the undisputed staple of Mexican cuisine).  Rice, potatoes, or even spaghetti noodles will work ... but only when you're in Cincinnati.

Thursday, January 7, 2016

Tamales


While enjoying Christmas in Texas, we learned about the Hispanic tradition of making tamales for the holidays.  It's an all-day activity that has simple enough steps that the whole family can get involved.  That means a very long blog post, but the final product is well worth the effort.

There are two main types of tamales:
1)  Mexico-style - The base is masa harina (fine grind corn flour).  Cooking method is steaming.
2)  Mississippi-style - The base is corn meal (coarse grind).  Cooking method is boiling.  Down South, we call 'em "hot tamales" because the boiling liquid is liberally spiced.

Note that neither of these are the sweet corn typically sold in supermarkets.  Field corn (or maize) has large, starchy, and thick-shelled kernels.  Some varieties can grow quite large.

A process called nixtamalization is used to remove the outer shell.  This is a long soak in alkaline solution (calcium hydroxide, usually), followed by mechanical separation of the shell from the core.

After drying, the corn is milled into flour or meal.  For today's recipe, we will be using fine grind for Mexico-style tamales.

You can also use coarse grind corn meal for Mississippi-style tamales (and grits, but that's another recipe).

Part 1:

Cook the meat that we will be using for the filling.  I'm following Alton Brown's recipe for Turkey Tamales (LINK) that begins with a spicy boil:
  • 2 teaspoons chili powder
  • 1 1/2 teaspoons cumin
  • 1 teaspoon cayenne pepper
  • 1 teaspoon dried oregano
  • 1 teaspoon kosher salt
  • 1 teaspoon freshly ground black pepper


Place 2-3 raw turkey legs into a large pot with your spice mixture.


Fill with enough water to cover the drumsticks.


Bring to a boil and let simmer for 2 hours.  The meat will be fall-off-the-bone tender.


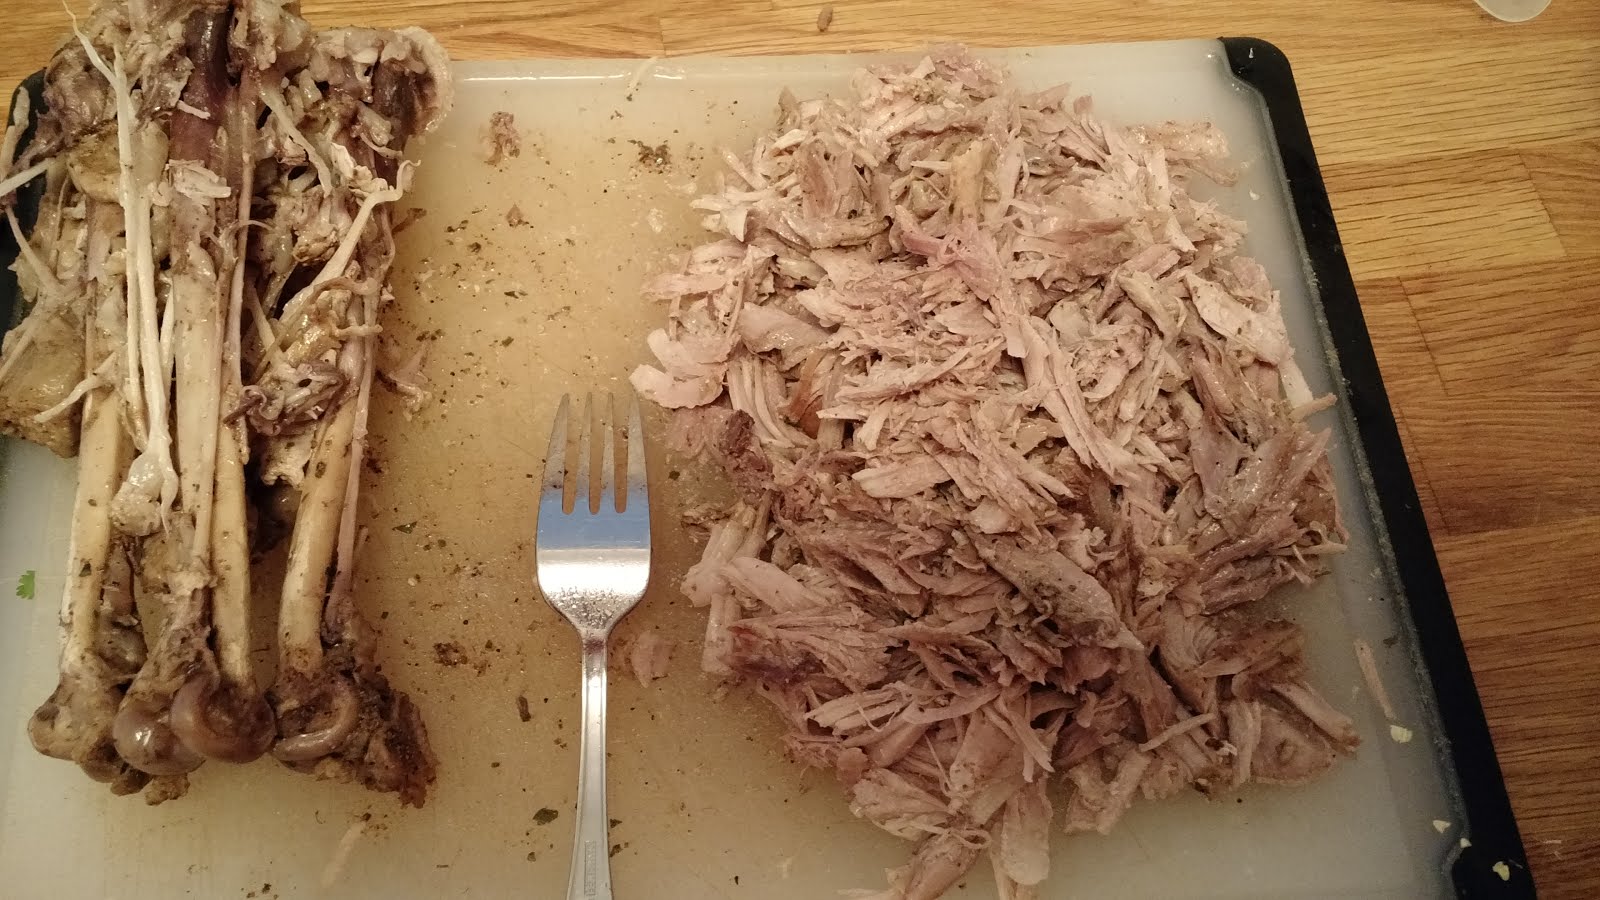
Pull the drumsticks from the vat of tastiness and allow to cool.

Just like with pulled pork (shameless plug for one of our favorite recipes), shred the turkey meat.

Part 2:  

Prepare the veggie base for the filling:

  • 1 small onion, finely chopped
  • 3 cloves garlic, minced
  • 1 serrano chile, seeded and finely minced
  • 1/4 cup vegetable oil

Heat the oil in a medium saute pan and cook down the onion until the edges just start to brown.


Toss in the garlic and pepper, and keep them moving (to prevent burnt garlic).
 

Salvage 1/2 cup of the turkey broth from earlier.  Incorporate it and the shredded turkey meat into your veggie base.  The meat will re-absorb much of the liquid .  Let it simmer for a couple minutes, until there isn't any liquid on the bottom when you stir.

Part 3:

Next is the masa dough.  If your corn husks will be small (like mine were), the masa:meat ratio will be higher.  For this batch, I added 50% to Alton's recipe, for a total of:

  • 6 cups masa harina
  • 1.5 tablespoon kosher salt
  • 3.5 teaspoons baking powder
  • 3/4 cups lard

After mixing the dry ingredients, roll up your sleeves and kneed in the lard by hand.  You'll know it's ready when the lard goes from clumpy to crumbly (see below).


Incorporate 3-4 cups of the turkey broth/liquid from earlier, and kneed with your hands.  "Thick mashed potatoes" is the ideal consistency.

Part 4:

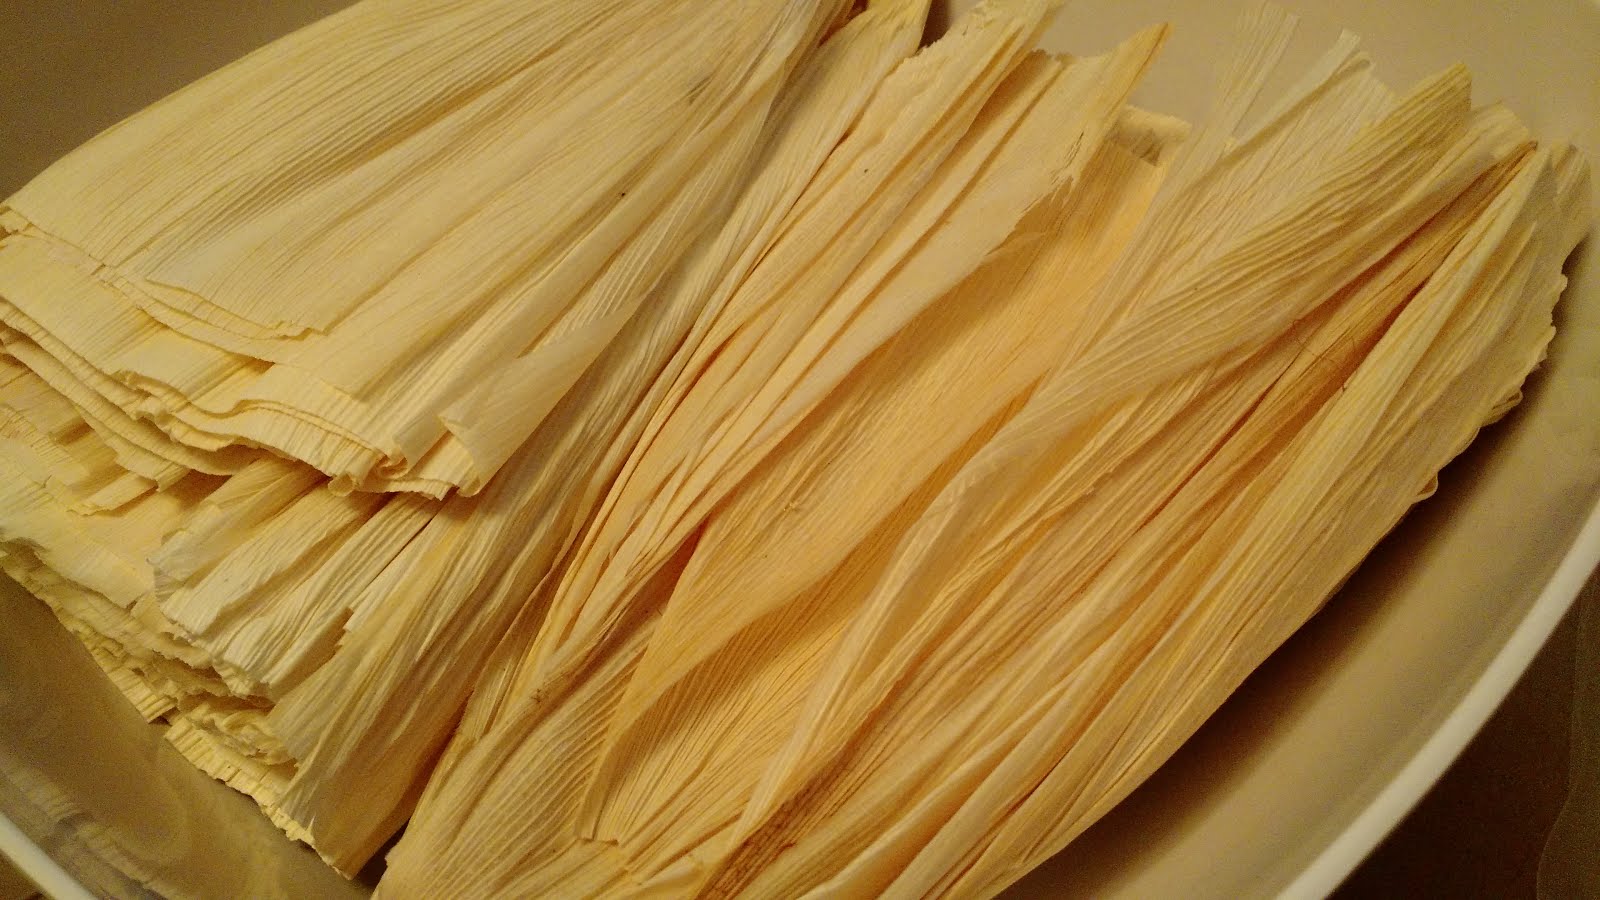
Rehydrate the corn husks in large container of water.  Room temperature water works, but if you're in a hurry... hot water will expedite absorption.


Corn husks float, so add some weight.  We had to get creative!


In preparation for Part 5, let's cut 12" (25 mm) segments of twine.

Also, prepare a pot for steaming.  I used ~1 quart of water.
 

Part 5:

Tamales... Assemble!

It's been a long road, but we're almost done.  Start with a corn husk that has been towel-dried.  Drop in 1.0 - 1.5 tablespoons of masa dough.

Leave 1.5 - 2" at the pointy end.  Also, press the center strip down, making a corny canoe.

Place 1.0 - 1.5 tablespoons of filling into the canoe.  Spread the filling evenly.

Use the sides to press down the center strip and roll over the sides.

Just like wrapping a burrito, roll the masa to one side.  Tuck the edge of the corn husk in, and roll the tamale.  After it's cigar shaped, fold down the pointy end.  Place the tamale face down, for future storage.

We will wrap 3 tamales into each bundle.  Begin by placing the 12" segment of twine horizontally.  The folded end of each tamale will be facing up and inward.


Add the third tamale, and tie the twine using your favorite knot.  That Boy Scout merit badge finally paid off.


Toss the bundle of joy into the steamer basket and repeat a billion times.

Put the pot on the stove, heat until the water starts to boil, and set to LOW for 1.5 hours.


Tamales are great by themselves, but they will benefit from some beans, rice, chips, queso, guacamole, or salsa.  We had black-eyed peas and some tomatillo salsa verde for our New Year's celebration... and that paired excellently.